 Mazda Mazda6: Rear Window Defroster
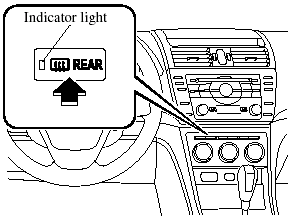
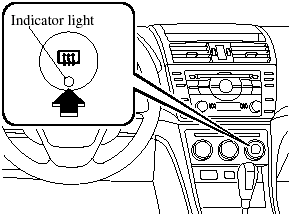
The rear window defroster clears frost, fog, and thin ice from the rear window.
The ignition must be switched ON.
Press the switch to turn on the rear window defroster. The rear window defroster operates for about 15 minutes and turns off automatically.
The indicator light illuminates during operation.
To turn off the rear window defroster before the 15 minutes has elapsed, press the switch again.
 Fully Automatic
Type Air-Conditioning
Fully Automatic
Type Air-Conditioning
 Manual Type
Air-Conditioning
Manual Type
Air-Conditioning
CAUTION:
Do not use sharp instruments or window cleaners with abrasives to clean the inside of the rear window surface. They may damage the defroster grid inside the window.
NOTE:
This defroster is not designed for melting snow.
If there is an accumulation of snow on the rear window, remove it before using the defroster.
Mirror Defroster
To turn on the mirror defrosters, switch the ignition ON and press the rear window defroster switch
NOTE:
For vehicles equipped with mirror de-fogging equipment,
 is indicated on each door mirror.
 WindshieldWipers and Washer
The ignition must be switched ON.
WARNING:
Use only windshield washer fluid or plain water in the reservoir:
Using radiator antifreeze as washer fluid is dangerous. If sprayed on the windshield,
...
 Horn
Horn
To sound the horn, press the mark
on the steering wheel. ...
See also:
Latch lower anchor
WARNING:
Failure to follow the warnings and instructions for proper use and installation
of child restraints could result in serious injury or death of a child or other
passengers in a sudden sto ...
Brake assistant
When you apply the brakes rapidly, this system
automatically produces the maximum braking
force boost. It thus helps to achieve the shortest
possible braking distance during full braking.
This ...
Tail/Back-up light (Outback)
1. Apply a flat-head screwdriver to the light cover as shown in the illustration,
and pry the light cover off from the rear gate trim.
1) Back-up light
2) Tail light
2. Turn the bulb socket c ...