Ford Fusion: Changing a bulb
 Ford Fusion: Changing a bulb
WARNINGS:
Switch the lights and the ignition off.
Let the bulb cool down beforeremoving it.
CAUTIONS:
Do not touch the glass of the bulb.
Only fit bulbs of the correctspecification. See Bulbspecification chart.
Note: The following instructions describehow to remove the bulbs. Fit replacementin the reverse order unless otherwisestated.
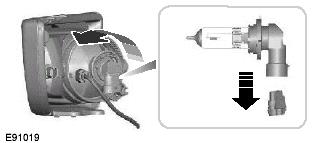
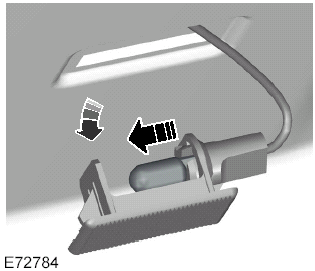
Headlamp main and dippedbeam
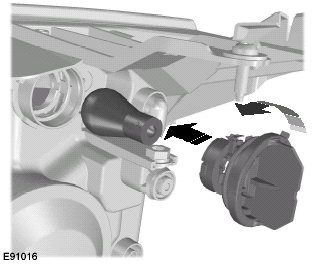
1. Remove the headlamp. SeeRemoving a headlamp.
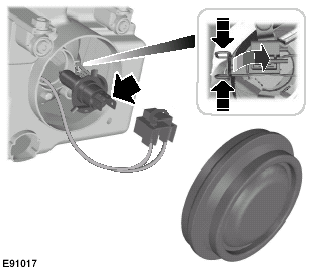
2. Remove the cover.
3. Disconnect the electrical connector.
4. Release the clip and remove the bulb.
Side lamps
1. Remove the headlamp. SeeRemoving a headlamp.

2. Remove the cover.
3. Carefully prise out the bulb holder.
4. Remove the bulb.
Front direction indicators
1. Remove the headlamp. SeeRemoving a headlamp.
2. Turn the bulb holder anticlockwise andremove it.
3. Gently press the bulb into the bulbholder, turn it anticlockwise andremove it.
Side repeaters
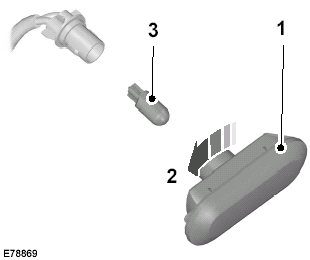
1. Carefully remove the side repeater.
2. Hold the bulb holder, turn the housinganticlockwise and remove it.
3. Remove the bulb.
Front fog lamps
1. Disconnect the electrical connector.
2. Turn the bulb holder anticlockwise andremove it.
Rear lamps
1. Open the tailgate.
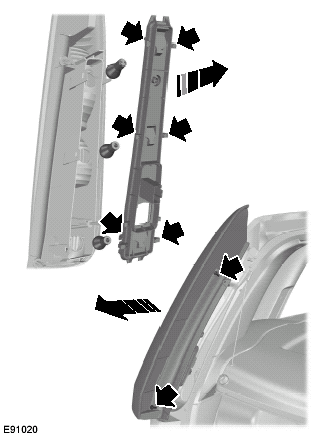
2. From inside the luggagecompartment, remove the wing nuton the back of the rear lamp.
3. Remove the screws and remove therear lamp assembly.
4. Release the clips and remove the bulbholder.
5. Gently press the bulbs into the bulbholder, turn them anticlockwise andremove them.
Central high mounted stoplamp

1. Open the tailgate.
2. Remove the rubber grommet.
3. Release the clips using a flat-bladedscrewdriver and remove the lamp.
4. Unclip the bulb holder and remove thebulb.
Number plate lamp
1. Loosen the screws and remove thelamp.
2. Remove the bulb.
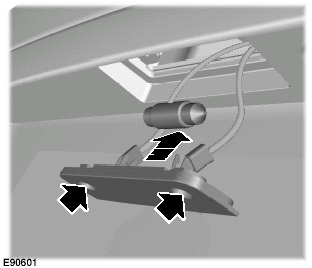
Interior lamp
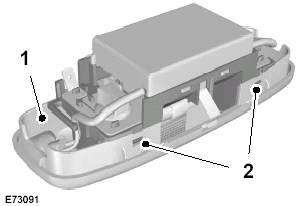
1. Carefully prise out the lamp.
2. Remove the lens.
3. Remove the bulb.
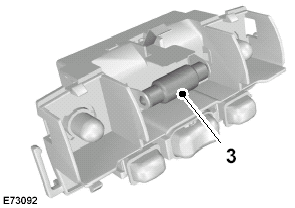
Reading lamps
1. Carefully prise out the lamp.
2. Turn the bulb holder anticlockwise andremove it.
3. Remove the bulb.
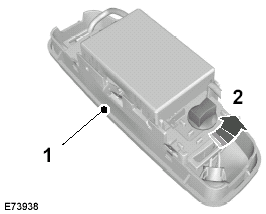
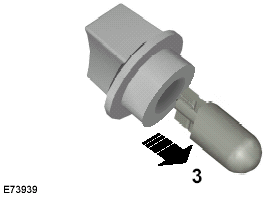
Luggage compartment lamp
1. Carefully prise out the lamp.
2. Remove the bulb.


