BMW 5 Series: Interior equipment
 BMW 5 Series: Interior equipment
Vehicle equipment
All standard, country-specific and optional equipment that is offered in the model series is described in this chapter. Therefore, equipment is also described that is not available in a vehicle, e. g., because of the selected optional equipment or country variant. This also applies for safety-related functions and systems.
- Integrated universal remote control
- Ashtray/cigarette lighter
- Connecting electrical devices
- Through-loading system
- Ski bag
Integrated universal remote control
The concept
This system can replace up to three different hand-held transmitters for various types of remote- controlled equipment, such as garage doors or lighting systems.
The hand-held transmitter signal can be programmed on one of the three memory buttons.
The corresponding device can then be operated using the programmed memory button.
The LED indicates that a signal is being transmitted.
When selling the vehicle, delete the stored programs for security reasons.
 During programming
During programming and before activating
a device using the integrated universal remote
control, ensure that there are no people,
animals, or objects in the range of movement of
the remote-controlled device; otherwise, there
is a risk of injury or damage.
Also follow the safety instructions of the handheld transmitter.◀
Compatibility
 If this symbol is printed on the
packaging
or in the instructions of the hand-held
transmitter, the remote-controlled device is
generally compatible with the integrated universal
remote control.
If this symbol is printed on the
packaging
or in the instructions of the hand-held
transmitter, the remote-controlled device is
generally compatible with the integrated universal
remote control.
If you have any questions, please contact:
▷ Your service center.БЮ ▷ www.homelink.com on the Internet.
HomeLink is a registered trademark of Johnson Controls, Inc.
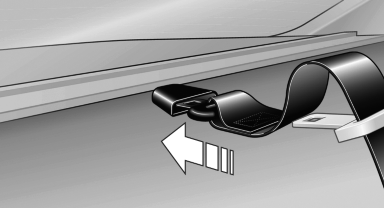
Programming
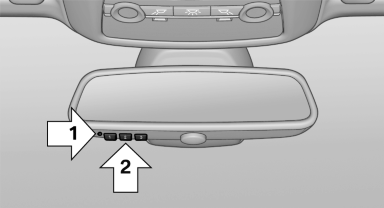
▷ LED, arrow 1.
▷ Memory buttons, arrow 2.
Fixed-code hand-held transmitters
1. Switch on the ignition.
2. Initial setup:
Press the two outer memory buttons 1 and
3 for approx. 20 seconds until the LED, arrow
1 flashes.
All programs of the three memory buttons,
arrow 2, are cleared.
3. Hold the hand-held transmitter a distance of
approx. 1 to 3 in/2.5 to 8 cm from the memory
buttons.
The required distance depends on the
manual transmitter.
4. Simultaneously press the transmit button of
the hand-held transmitter and the memory
button of the integrated universal remote
control.
The LED flashes slowly.
5. Release both buttons when the LED flashes
rapidly.
If the LED does not flash rapidly after approx.
60 seconds, change the distance and repeat
the step.
Canada: if the LED is not flashing rapidly after
approx. 60 seconds, change the distance
and repeat the step, or, if the programming
was interrupted by the hand-held transmitter,
hold down the memory button and press
and release the button on the hand-held
transmitter again for 2 seconds.
6. To program other hand-held transmitters,
repeat steps 3 to 5.
The device can be operated using the memory
button with the engine running or the ignition
switched on.
Malfunction
If the device cannot be used after repeated attempts at programming, please check whether the hand-held transmitter is equipped with an alternating code system.
To do so:
▷ Read the instructions of the hand-held
transmitter.
▷ Hold down the memory button of the
integrated universal remote control longer.
If the LED of the integrated universal remote control flashes rapidly for a brief period and then lights up continuously, the hand-held transmitter is equipped with an alternating code system.
In this case, program the memory buttons as described under Alternating-code hand-held transmitters.
Alternating-code hand-held transmitters
Please obtain information on synchronizing the device in the operating manual of the device being set up.
Programming will be easier with the aid of a second person.
1. Park the vehicle within range of the remotecontrolled
device.
2. Program the integrated universal remote
control as described above under Fixedcode
hand-held transmitters.
3. Locate the button on the receiver of the device
to be set, e.g., on the drive.
4. Press the button on the receiver of the device
to be set. You have approx. 30 seconds
for the next step.
5. Hold down the programmed memory button
of the integrated universal remote for approx.
3 seconds. Repeat this work step, if necessary, up to three times.
The device can be operated using the memory button with the engine running or the ignition switched on.
Reassigning individual programs
1. Switch on the ignition.
2. Hold the hand-held transmitter a distance of
approx. 1 to 3 in/2.5 to 8 cm from the memory
buttons.
The required distance depends on the
manual transmitter.
3. Hold down the memory button of the
integrated universal remote control.
4. If the LED flashes slowly after approx.
20 seconds, press the transmit button on
the hand-held transmitter.
5. Release both buttons when the LED flashes
rapidly.
If the LED does not flash rapidly after approx.
60 seconds, change the distance and repeat
the step.
Canada: if the LED is not flashing rapidly after
approx. 60 seconds, change the distance and
repeat the step, or, if the programming was interrupted
by the hand-held transmitter, hold
down the memory button and press and release
the button on the hand-held transmitter again
for 2 seconds.
Deleting all stored programs
Press the two outer memory buttons for approx.
20 seconds until the LED flashes rapidly.
All stored programs are deleted.
The programs cannot be deleted individually
Ashtray/cigarette lighter
Front: manual transmission
Opening

Press on the cover.
Emptying
Take out the insert.
Lighter
 Push in the lighter.
The lighter can be removed as soon as it pops back out.
Danger of burns
Only hold the hot lighter by its knob; otherwise,
there is the danger of getting burned.
Switch off the ignition and take the remote control with you when leaving the vehicle so that children cannot use the lighter and burn themselves.◀
Front: automatic transmission
Opening
Press on the cover.
Emptying
Take out the insert.
Lighter

Press on the cover
 Push in the lighter.
The lighter can be removed as soon as it pops back out.
Danger of burns
Only hold the hot lighter by its knob; otherwise,
there is the danger of getting burned.
Switch off the ignition and take the remote control with you when leaving the vehicle so that children cannot use the lighter and burn themselves.◀
Rear
Opening
Press on the cover.
Emptying
Take out the insert.
Lighter

Push in the lighter.
The lighter can be removed as soon as it pops back out.
Danger of burns
Only hold the hot lighter by its knob; otherwise,
there is the danger of getting burned.
Take the remote control with you when leaving the vehicle so that children cannot use the lighter and burn themselves.◀
Connecting electrical devices
Sockets
The lighter socket can be used as a socket for electrical equipment while the engine is running or when the ignition is switched on. The total load of all sockets must not exceed 140 watts at 12 volts.
Do not damage the socket by using unsuitable connectors.
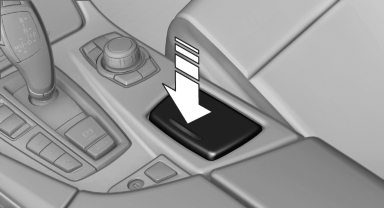
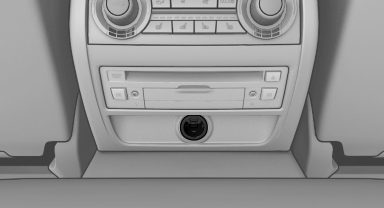
Front center console: manual transmission
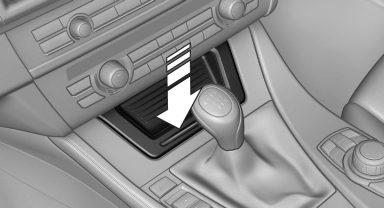
Press on the cover.
Remove the cover or cigarette lighter.
Front center console: automatic transmission
Press on the cover.
Remove the cover or cigarette lighter.
Center armrest
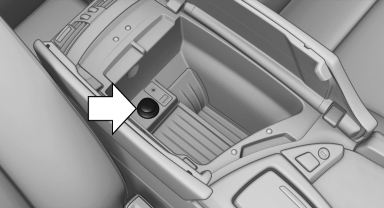
Remove cover.
Rear center console
Remove the cover or cigarette lighter.
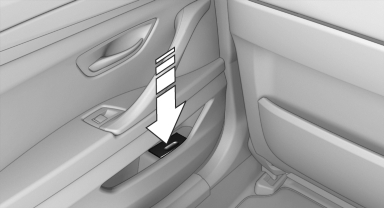
In the front passenger footwell
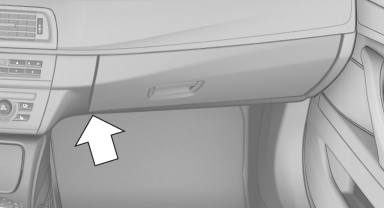
Socket is located below the glove compartment.
To access the socket: fold open the cover.
In the cargo area
The socket is located in the cover of the loading lip.
To access the socket: fold open the cover.
Through-loading system
General information
The cargo area can be enlarged by folding down the rear seat backrest.
The rear seat backrest is divided into two parts at a ratio of 60 to 40. The sides can be folded down separately or together.
Opening
Move the front seats to an upright position
Before folding down the rear backrests,
ensure that the front seats are moved forward
slightly and are in an upright position. Otherwise,
the head restraint and screen could be
damaged.◀
1. Unlock the belt lock of the center safety belt
in the rear using the latch plate of another
safety belt.
2. Insert the latch plate at the end of the belt
into the specially designated fixture on the
rear window shelf.
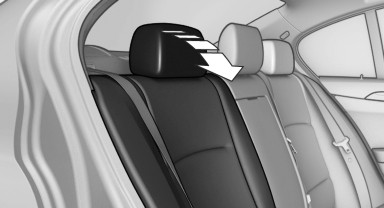
3. Push the corresponding head restraint
down as far as it will go.
4. Pull the corresponding lever in the cargo
area to release the rear seat backrest.

5. The unlocked rear seat backrest moves forward slightly. Fold the backrest forward by the head restraint.
Closing
1. Return the rear seat backrest to the upright seating position and engage it.
Ensure that the lock is securely engaged
When folding back the backrest, be sure that
it locks in place securely. If it is not properly
engaged, transported cargo could enter the
passenger compartment during braking or
evasive maneuvers and endanger the vehicle
occupants.◀
2. Release the latch plate from the fixture on the rear window shelf and insert it into the belt lock of the center safety belt. Make sure you hear the latch plate engag
To secure cargo, with nets or draw straps, the cargo area is fitted with lashing eyes.
Ski bag
Capacity
The ski bag can be used to transport up to four pairs of skis with a length of up to 6 ft/2.10 m or, depending on the binding, up to two snowboards with a length of up to 5 ft/1.60 m.
Preparing and loading the ski bag
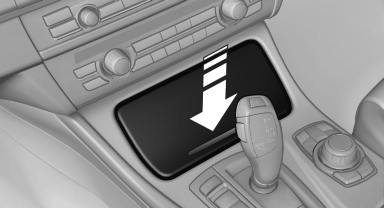
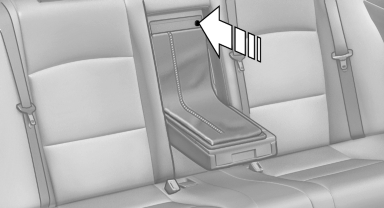
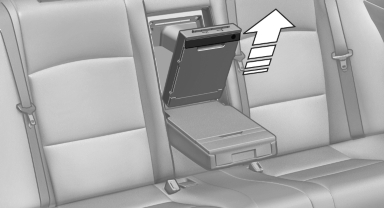
1. Fold open the center armrest on the inside.
2. Open the inside cover and cargo area by
pressing the button
3. Lay out the ski bag.
4. Load the ski bag. If necessary, wrap the
sharp edges of the skis
5. Insert the tongue plate into the belt buckle.

6. Tighten the retaining strap.
Securing the ski bag
Secure the ski bag by tightening the retaining
strap; otherwise, the contents could
present a source of danger to the passengers,
for example during braking or evasive maneuvers.◀
Removing the ski bag
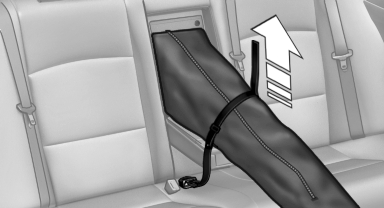
The ski bag can be removed entirely, e.g., to dry quickly or to use other inserts.
1. Pull the handle forward and lift the ski bag
out.
2. Close the cover in the cargo area.
More information on the various inserts available can be obtained from your service center.


