Subaru Legacy: Satellite radio operation (if equipped)
 Subaru Legacy: Satellite radio operation (if equipped)
To receive satellite radio, it is necessary to install the SUBARU genuine satellite receiver for some models, and to enter into a contract with a satellite radio network service such as “XMTM satellite radio” (for U.S.A. only) or “Sirius satellite radio”. For details, please contact your SUBARU dealer.
- XMTM satellite radio (for U.S.A. only)
- Sirius satellite radio
- Satellite radio reception
- Displaying satellite radio ID of tuner
- Band selection
- Channel and category selection
- Channel preset
- Display selection
XMTM satellite radio (for U.S.A. only)
XMTM is a continental U.S. based satellite radio service, including music, news, sports, talk and children’s programming. XMTM provides digital quality audio and text information, including song title and artist name. A service fee is required to receive the XMTM service. For more information, contact XMTM at www.xmradio.com or call 1-800-XMRADIO (1-800-967-2346).
Sirius satellite radio
Sirius satellite radio is a recent innovation that allows the listener to experience digital sound quality and to have a greater variety of channels.
Use of satellite radio (Sirius) requires a tuner, antenna and a service contract. For details, please contact your SUBARU dealer or visit Sirius Satellite Radio at www.sirius.com or call 1-888-539-SIRIUS (7474) for more information. Sirius, the Sirius dog logo, channel names and logos are trademarks of SIRIUS Satellite Radio Inc.
Satellite radio reception
Satellite radio signals are best received in areas with a clear view of the open sky. In areas where there are tall buildings, trees, tunnels or other structures that may obstruct the signal of the satellites, there may be signal interruptions. Other circumstances that may result in signal loss include driving near a wall, steep cliff, hill or driving on the lower level of a multitiered road or inside of a parking garage. To help reduce this condition, satellite radio providers have installed groundbased repeaters in heavily populated areas. However, you may still experience reception problems in some areas.
XMTM satellite radio reception tips for antenna on the windshield (for U.S.A. only — if equipped)
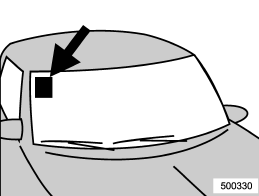
For some models, the satellite radio antenna is fixed to the upper right hand corner of the windshield.
The XMTM satellite radio receiver that is fitted to your vehicle receives the necessary signals from two specially designated satellites that are in a geostationary orbit over the equator. One satellite covers the east coast and the other covers the west coast. Both of them direct their signals north. These signals are then relayed throughout the radio reception area by a network of ground repeater stations. The satellite radio signals are transmitted as “line of sight” signals. The line of sight signals can be blocked by objects such as buildings, but the network of repeater stations allows signal coverage within urban areas such as cities.
You may experience problems in receiving XMTM satellite radio signals in the following situations.
● If you are driving northward in a coastal area
Because the satellite radio antenna is located on the windshield, the signal comes from the south and may not be able to reach the antenna in some circumstances when you are driving north.
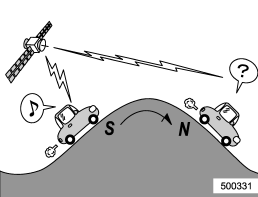
● If you are driving in a tunnel or a covered parking area
● If you are driving beneath the top level of a multi-level freeway
● If you drive under a bridge
● If you are driving next to a tall vehicle (such as a truck or a bus) that blocks the signal
● If you are driving in a valley where the surrounding hills or peaks block the signal from the south
● If you are driving on a mountain road where the southern direction is blocked by mountains
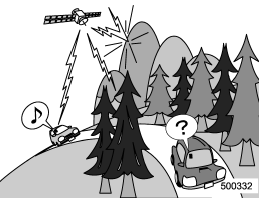
● If you are driving in an area with tall trees that block the signal (10 m or more), for example on a road that goes through a dense forest
● The signal can become weak in some areas that are not covered by the repeater station network.
Please note that these may be other unforeseen circumstances when there are problems with the reception of XMTM satellite radio signals.
Displaying satellite radio ID of tuner
When you activate satellite radio, you should have your satellite radio tuner ID ready because each tuner is identified by its unique satellite radio tuner ID.
The satellite radio ID will be needed when you activate satellite radio and receive satellite radio customer support. The satellite radio ID can be found on the audio display by tuning the channel to “000”.
Turn the “TUNE/TRACK/CH” dial to select the satellite radio channel.
NOTE
For Sirius, change the display to an indication mode other than the channel number after performing the above operation.
Band selection
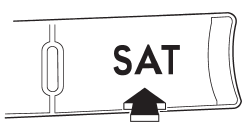
Press the “SAT” button when the radio is off to turn on the radio. Press the “SAT” button when the radio is on to select SAT1, SAT2 or SAT3 reception.
Channel and category selection
Channel selection by operating the dial
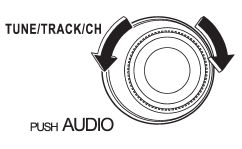
Turn the “TUNE/TRACK/CH” dial clockwise to select the next channel and turn the “TUNE/TRACK/CH” dial counterclockwise to select the previous channel.
Channel selection by pressing the button
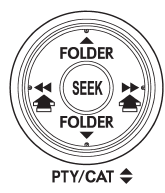
When in the SAT mode, briefly press the “SEEK” button “ ”
or “
 ” to select the channel.
Skip channel selection
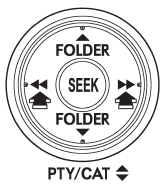
When in the SAT mode, press the “SEEK” button “ ”
or “
 ” continuously to change to the
channel selection mode. Pressing the “SEEK” button “
 ”
changes the channel up by 10 steps each time. Pressing “
 ”
changes the channel down by 10 steps each time.
Category selection
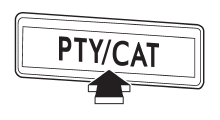
To activate the category search mode, press the “PTY/CAT” button. To deactivate the category search mode, press the “PTY/CAT” button again.
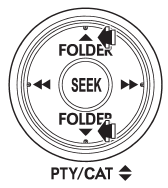
When in the category search mode, pressing the “FOLDER” button “ ”
changes the category up by one step. Pressing “
 ”
changes the category down by one step.
When a category is selected, pressing the “SEEK” button selects channels only within the selected category.
The control function returns to the normal mode after approximately 10 seconds.
Channel scan

If you press the “SCAN” button while the radio is in the category search mode, the radio turns to the category SCAN mode. In the category SCAN mode, the radio scans only channels in the selected category. If you press the “SCAN” button while the radio is not in the category search mode, the radio turns to the ALL SCAN mode. In the ALL SCAN mode, the radio scans all channels.
In both SCAN modes, the radio will stop at the station for 5 seconds while displaying the channel number, after which scanning will continue until the entire channel has been scanned from the low end to the high end.
Press the “SCAN” button again to cancel the SCAN mode and to stop on any displayed channel.
Channel preset

Preset buttons
How to preset channels
1. Press the “SAT” button to select SAT1, SAT2 and SAT3 reception.
2. Select the desired channel.
3. Press one of the preset buttons for more than 1.5 seconds to store the channel.
If the button is pressed for less than 1.5 seconds, the preceding selection will
remain in memory.
NOTE
If the connection between the radio and battery is broken for any reason such as vehicle maintenance or radio removal, all channels stored in the preset buttons are cleared. If this occurs, it is necessary to reset the preset channels.
Selecting preset channels
Presetting a channel with a preset button allows you to select that channel in a single operation. Up to six SAT1, SAT2 and SAT3 channels each may be preset.
Display selection
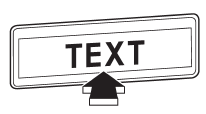
Press the “TEXT” button while receiving the satellite radio to change the display as follows:


